整体思路
- 创建一个需要扩展的组件
- 定义一个XSD文件,描述组件内容
- 创建一个java类,实现BeanDefinitionParser接口,用来解析XSD文件中的定义和组件定义
- 创建一个Handler类,扩展子NameSpaceHandlerSupport,目的是将组件注册到容器。
- 编写(添加)Spring.handlers和Spring.schemas文件。
解析流程:通过Spring.schemas找到对应的XSD文件,校验xml格式;通过Spring.handlers找到对应的NamespaceHandler类作为解析自定义标签的类,通过init方法中的参数BeanDefinition实现类,根据解析的值生成BeanDefinition,
目录结构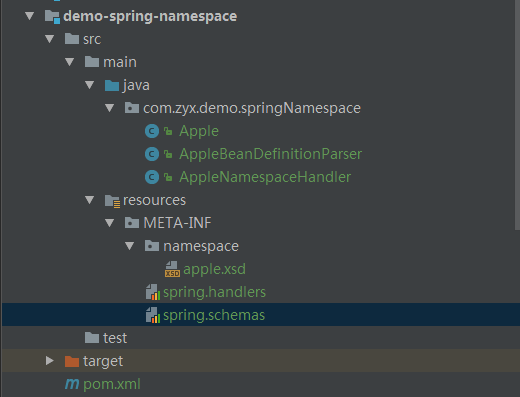
创建模型类
1 | public class Apple { |
创建xsd文件
对于该类标签的定义,spring中有着相应的XSD定义文档
http://www.springframework.org/schema/beans
对于XSD,简单的说是xml的一个标签的定义,在这里就不对XSD过多的解释了,祥见
http://www.w3school.com.cn/schema/schema_example.asp1
2
3
4
5
6
7
8
9
10
11
12
13
14
15
16
17
18
19
20
21
22
23
<xsd:schema xmlns="http://www.zyx.com/schema/apple"
xmlns:xsd="http://www.w3.org/2001/XMLSchema"
xmlns:beans="http://www.springframework.org/schema/beans"
targetNamespace="http://www.zyx.com/schema/apple"
elementFormDefault="qualified"
attributeFormDefault="unqualified">
<xsd:import namespace="http://www.springframework.org/schema/beans" schemaLocation="http://www.springframework.org/schema/beans/spring-beans.xsd" />
<xsd:element name="apple">
<xsd:complexType>
<xsd:all>
<xsd:element ref="apple-color" minOccurs="1" maxOccurs="1"/>
</xsd:all>
<xsd:attribute name="id" type="xsd:string" />
<xsd:attribute name="name" type="xsd:string" use="required"/>
</xsd:complexType>
</xsd:element>
<xsd:element name="apple-color">
<xsd:complexType>
<xsd:attribute name="color" type="xsd:string" use="required"/>
</xsd:complexType>
</xsd:element>
</xsd:schema>
type是用来定义该属性的格式,例如
xsd:string 表示是一个字符串,对格式没什么要求
xsd:id 表示该属性的值是一个id,有格式要求(例如不能以数字开头)。
xsd:IDREF 表示该属性的值与某xsd:id属性的值对应
其他还有很多,例如number,double,datetime等等。
编写spring.schemas
改配置文件主要是用一个url来映射我们第一步配置好的文件,形式如下1
http\://www.zyx.com/schema/apple.xsd=META-INF/namespace/apple.xsd
编写BeanDefinition,解析xml
1 | public class AppleBeanDefinitionParser extends AbstractSingleBeanDefinitionParser { |
编写NamespaceHandlerSupport
我们配置了com.zyx.demo.springNamespace.AppleNamespaceHandler类作为解析自定义标签的类,所以namespace为apple的标签,都会用这里注册的标签解析器来解析1
2
3
4
5public class AppleNamespaceHandler extends NamespaceHandlerSupport {
public void init() {
registerBeanDefinitionParser("apple",new AppleBeanDefinitionParser());
}
}
编写spring.handlers
这个配置文件用来配置解析我们apple标签,然后生成一些BeanDefinition进行注册1
http\://www.zyx.com/schema/apple=com.zyx.demo.springNamespace.AppleNamespaceHandler
到这里就写完了,下面是测试
测试:创建spring.xml
1 |
|
测试代码
1 |
|